- Afrikaans
- Albanian
- Amharic
- Arabic
- Armenian
- Azerbaijani
- Basque
- Belarusian
- Bengali
- Bosnian
- Bulgarian
- Catalan
- Cebuano
- China
- Corsican
- Croatian
- Czech
- Danish
- Dutch
- English
- Esperanto
- Estonian
- Finnish
- French
- Frisian
- Galician
- Georgian
- German
- Greek
- Gujarati
- Haitian Creole
- hausa
- hawaiian
- Hebrew
- Hindi
- Miao
- Hungarian
- Icelandic
- igbo
- Indonesian
- irish
- Italian
- Japanese
- Javanese
- Kannada
- kazakh
- Khmer
- Rwandese
- Korean
- Kurdish
- Kyrgyz
- Lao
- Latin
- Latvian
- Lithuanian
- Luxembourgish
- Macedonian
- Malgashi
- Malay
- Malayalam
- Maltese
- Maori
- Marathi
- Mongolian
- Myanmar
- Nepali
- Norwegian
- Norwegian
- Occitan
- Pashto
- Persian
- Polish
- Portuguese
- Punjabi
- Romanian
- Russian
- Samoan
- Scottish Gaelic
- Serbian
- Sesotho
- Shona
- Sindhi
- Sinhala
- Slovak
- Slovenian
- Somali
- Spanish
- Sundanese
- Swahili
- Swedish
- Tagalog
- Tajik
- Tamil
- Tatar
- Telugu
- Thai
- Turkish
- Turkmen
- Ukrainian
- Urdu
- Uighur
- Uzbek
- Vietnamese
- Welsh
- Bantu
- Yiddish
- Yoruba
- Zulu
Warning: Undefined array key "array_term_id" in /home/www/wwwroot/HTML/www.exportstart.com/wp-content/themes/1371/header-lBanner.php on line 78
Warning: Trying to access array offset on value of type null in /home/www/wwwroot/HTML/www.exportstart.com/wp-content/themes/1371/header-lBanner.php on line 78
Precision Mechanical Equipment for Satellite Platforms & Remote Sensing
Industry Trends: The Evolution of Mechanical Equipment for Advanced Platforms
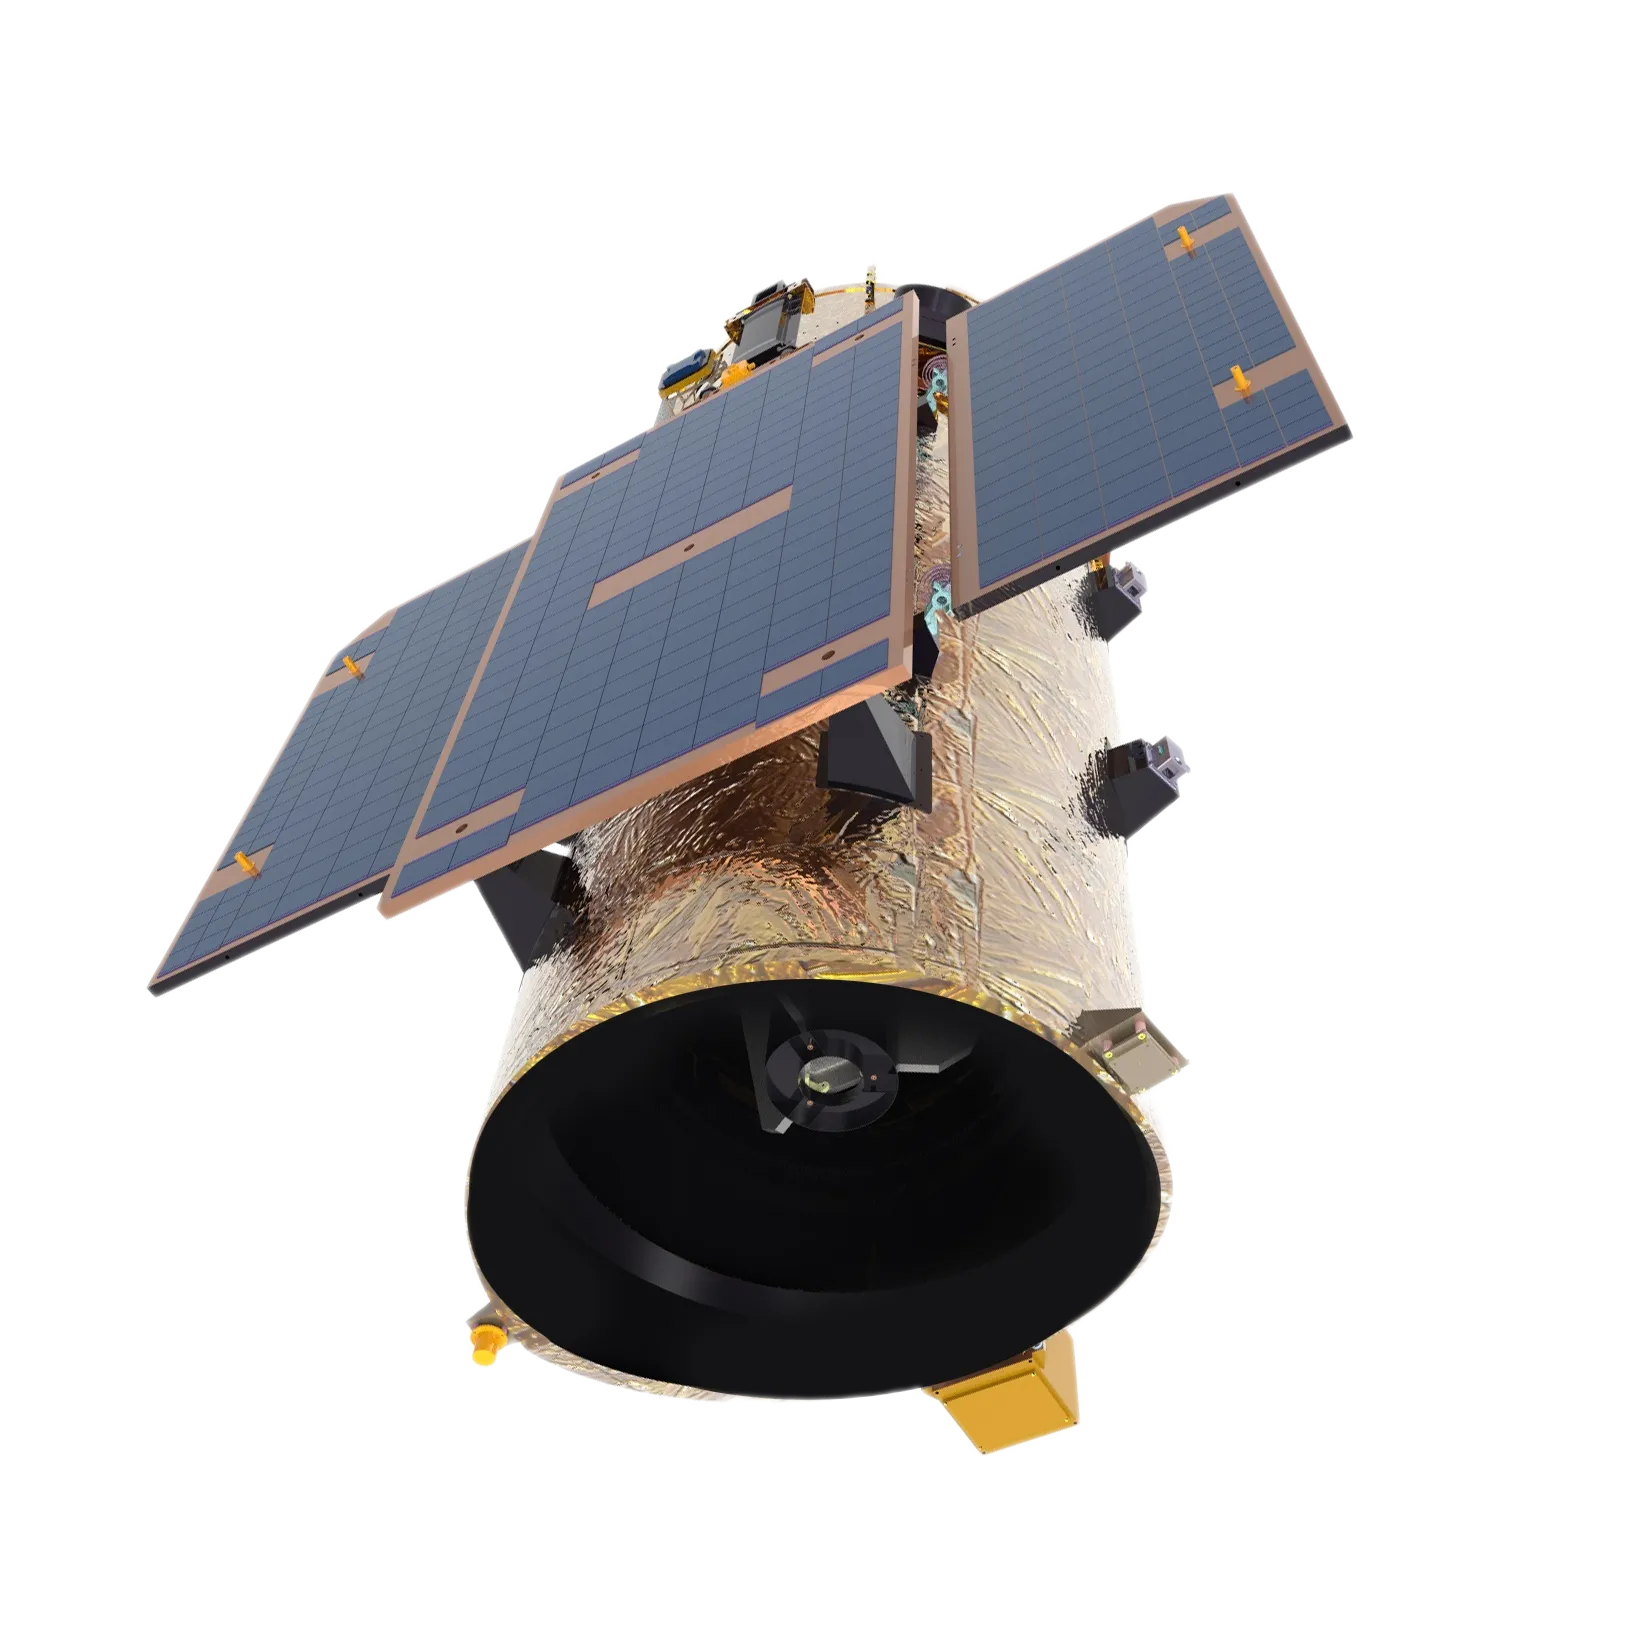
The landscape of mechanical equipment is undergoing a profound transformation, driven by demands for higher precision, unparalleled reliability, and intelligent integration. From industrial automation to critical aerospace applications, the emphasis is now on components that can withstand extreme conditions, operate with sub-micron accuracy, and provide real-time performance feedback. A significant driver for this evolution is the burgeoning space industry, particularly the development of satellite platform in remote sensing. These platforms require exquisitely designed and manufactured mechanical equipment to ensure the stable operation of payloads, precise pointing, and long-term durability in the harsh vacuum of space.
Current trends indicate a move towards advanced materials, such as high-strength alloys and composites, coupled with sophisticated manufacturing techniques like additive manufacturing (3D printing) and ultra-precision CNC machining. The integration of sensors and AI for predictive maintenance and real-time anomaly detection is also becoming standard, shifting the paradigm from reactive repairs to proactive asset management. Furthermore, the push for miniaturization without compromising performance means that the design and production of compact, high-performance mechanical equipment are paramount. This is especially true for the satellite platform sector, where every gram and cubic centimeter of space is critical.
According to a report by the Satellite Industry Association (SIA), global space economy revenues reached $386 billion in 2023, with satellite manufacturing and launch services contributing a substantial portion. This growth directly fuels the demand for high-quality, specialized mechanical equipment capable of meeting stringent space-grade requirements. The rigorous quality assurance protocols in this sector set a new benchmark for all industrial applications, pushing manufacturers to innovate beyond traditional boundaries.
Technical Parameters & Specifications of High-Precision Mechanical Equipment
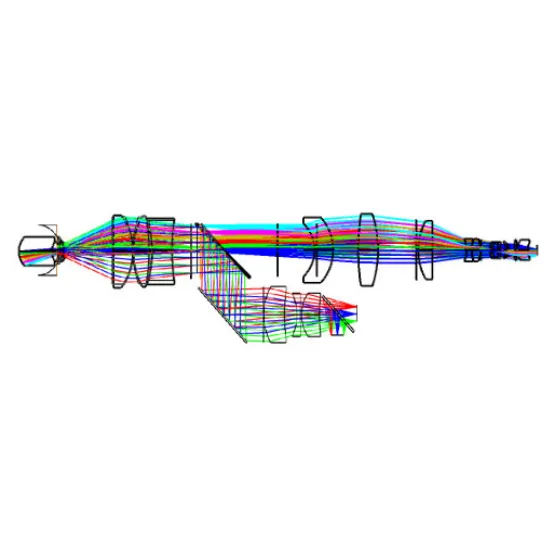
For applications demanding extreme precision, such as the optical systems on a remote sensing satellite platform, the technical parameters of mechanical equipment are incredibly stringent. Consider the Fundus Imager, a prime example of such advanced instrumentation designed for the most demanding environments. This device, accessible at https://www.space-navi.com/fundus-imager.html, embodies the fusion of optical and mechanical engineering excellence.
Fundus Imager: Key Specifications
| Parameter | Specification | Description |
|---|---|---|
| Optical Resolution | < 5 microns (typical) | Ability to resolve fine details, critical for remote sensing and medical imaging. |
| Angular Accuracy | < 0.001 degrees | Precision in pointing and alignment of optical components, vital for image stability. |
| Thermal Stability Range | -40°C to +85°C | Operational temperature range without significant performance degradation, crucial for space. |
| Vibration Resilience | MIL-STD-810G compliant | Resistance to shock and vibration, ensuring integrity during launch and operation. |
| Material Composition | Aerospace-grade Aluminum Alloys, Titanium, Invar, Zerodur | Selected for low thermal expansion, high strength-to-weight ratio, and long-term stability. |
| Lifespan (Designed) | > 15 years in LEO | Guaranteed operational longevity for extended mission durations. |
| Dimensions (Approx.) | 200mm x 150mm x 100mm | Compact design for integration into constrained satellite platforms. |
| Weight (Approx.) | < 2 kg | Minimizes launch mass, reducing overall mission costs. |
These specifications highlight the need for mechanical equipment that is not only robust but also capable of delivering consistent, high-fidelity performance under challenging operational parameters. The materials chosen, like Invar (a nickel-iron alloy known for its extremely low coefficient of thermal expansion) and Zerodur (a glass-ceramic with near-zero thermal expansion), are critical for maintaining optical alignment across wide temperature fluctuations, a common challenge for space-based instruments.
Application Scenarios: Where Precision Mechanical Equipment Excels
The versatility of high-precision mechanical equipment extends across numerous sectors, proving indispensable in scenarios where failure is not an option. From the depths of the ocean to the vacuum of space, these components are the backbone of advanced technological systems.
- Aerospace & Defense: Essential for satellite propulsion systems, optical payload pointing mechanisms, deployable structures, and guidance systems. For a satellite platform in remote sensing, precise gimbals and stages for cameras and sensors rely entirely on high-tolerance mechanical equipment.
- Medical Devices: Critical for robotic surgical instruments, diagnostic imaging equipment (like the Fundus Imager), and prosthetics, where human safety and diagnostic accuracy depend on unwavering performance.
- Semiconductor Manufacturing: Ultra-precision stages for lithography, wafer handling systems, and metrology equipment require motion control with nanometer-level accuracy, achievable only with highly engineered mechanical equipment.
- Research & Development: Laboratory instruments, particle accelerators, and astronomical observatories leverage bespoke mechanical equipment for experimental setup, sample manipulation, and precise optical alignment.
- Automotive (Advanced): For electric vehicle battery manufacturing, autonomous driving sensor integration, and sophisticated engine components, durability and precision are key.
In all these applications, the underlying requirement is a predictable and stable mechanical foundation. For instance, in a satellite platform, the stability of the imaging system directly impacts the clarity and usability of the remote sensing data. A slight vibration or thermal distortion can render valuable data useless, underscoring the vital role of meticulous design and quality assurance in the production of every piece of mechanical equipment.
Technical Advantages of Our Mechanical Equipment
Our mechanical equipment, epitomized by the Fundus Imager and similar precision components, offers distinct advantages that set them apart in demanding industrial and scientific applications:
- Exceptional Precision and Accuracy: Through advanced manufacturing techniques such as multi-axis CNC machining, electrical discharge machining (EDM), and high-precision grinding, we achieve dimensional tolerances as low as ±1 micron and surface finishes down to Ra 0.1 µm. This level of precision is fundamental for optical alignment, fluid dynamics, and motion control in sensitive instruments.
- Superior Material Selection: We utilize a diverse range of high-performance materials including aerospace-grade aluminum alloys (e.g., 6061-T6, 7075-T6 for high strength-to-weight), titanium alloys (Ti-6Al-4V for strength and corrosion resistance), stainless steels (316L for chemical inertness, 17-4PH for high hardness), and specialized superalloys (Inconel, Hastelloy for extreme temperature/corrosion environments). For specific optical applications, materials like Invar and Zerodur are chosen for their low coefficient of thermal expansion, ensuring stability in fluctuating temperatures.
- Robustness and Durability: Designed for extreme conditions, our mechanical equipment exhibits remarkable resistance to corrosion, high temperatures, intense vibrations, and radiation. Surface treatments like anodizing, hard coating, and specialized plating further enhance wear resistance and longevity. Our products have a designed lifespan of over 15 years, validated through accelerated life testing (ALT) mimicking real-world operational profiles, including thermal cycling, vacuum exposure, and vibration testing.
- Optimized Performance: Our designs prioritize functional performance, whether it's minimizing friction, maximizing thermal dissipation, or ensuring structural rigidity. For example, in petrochemical and metallurgy industries, our flow control components feature advanced anti-cavitation designs and erosion-resistant internal geometries, leading to superior energy efficiency and reduced maintenance. In water supply/drainage systems, our corrosion-resistant valves and pumps significantly reduce downtime and replacement costs compared to standard offerings.
- Integrated Quality Assurance: Every step of our manufacturing process is subject to rigorous quality control, adhering to international standards such as ISO 9001:2015 for quality management, AS9100D for aerospace, and ISO 13485 for medical devices (where applicable, for products like the Fundus Imager). We employ advanced metrology tools like Coordinate Measuring Machines (CMMs) with sub-micron accuracy, laser interferometers, and optical comparators to ensure every component meets exact specifications.
Manufacturing Process of Precision Mechanical Equipment: From Concept to Critical Component
The creation of high-performance mechanical equipment is a multi-stage process that marries advanced engineering with meticulous craftsmanship. Here’s a detailed breakdown, highlighting key stages and our commitment to quality assurance:
Process Flow Overview (Conceptual Diagram)
Step 1: Design & Simulation (CAD/CAM, FEA) → This initial phase involves conceptualizing the component using Computer-Aided Design (CAD) software. Detailed 3D models are created, followed by Finite Element Analysis (FEA) to simulate mechanical stress, thermal expansion, vibration, and fluid dynamics. This ensures the design meets performance criteria and identifies potential failure points before physical production begins. For a satellite platform component, this involves rigorous space-environment simulation.
Step 2: Material Selection & Preparation → Based on simulation results and application requirements (e.g., strength, corrosion resistance, thermal stability), the optimal material is selected. This could be high-grade aluminum, titanium, stainless steel, or exotic alloys. Raw materials undergo rigorous incoming inspection (e.g., spectrographic analysis, ultrasonic testing) to confirm composition and absence of defects.
Step 3: Primary Manufacturing Processes (Bulk Shaping) →
- Casting: For complex geometries or large components. Molten metal is poured into molds. We utilize investment casting (lost-wax process) for high precision and excellent surface finish, minimizing subsequent machining.
- Forging: For parts requiring superior strength and grain structure. Metal is heated and shaped by compressive forces (hammering or pressing). This eliminates internal voids and refines the grain, enhancing fatigue resistance.
- Extrusion: For long, uniform cross-sectional shapes (e.g., tubing, profiles). Heated material is pushed through a die.
Step 4: Precision Machining (Material Removal) → This is where high-accuracy takes center stage.
- CNC Machining (Computer Numerical Control): Multi-axis CNC milling, turning, and grinding machines precisely remove material according to CAD models. We employ 5-axis and 9-axis machines for complex contours and tight tolerances. Critical parameters include tool path optimization, spindle speed, and feed rate to achieve desired surface finish and dimensional accuracy.
- EDM (Electrical Discharge Machining): Used for intricate shapes or hard-to-machine materials where conventional methods are ineffective. Material is removed by electrical discharges between an electrode and the workpiece.
- Grinding & Honing: Abrasive processes used for achieving extremely fine surface finishes and tight dimensional tolerances, particularly for precision bearings, shafts, and optical surfaces.
Step 5: Surface Treatment & Finishing → To enhance properties like hardness, corrosion resistance, or aesthetic appeal.
- Anodizing: For aluminum, creating a durable, corrosion-resistant oxide layer.
- Heat Treatment: Processes like annealing, hardening, tempering to alter material microstructure and mechanical properties (e.g., strength, toughness).
- Plating & Coating: Nickel plating for corrosion resistance, PVD/CVD coatings for wear resistance or specific optical properties.
- Polishing & Lapping: For optical components or critical mating surfaces to achieve sub-nanometer roughness.
Step 6: Assembly & Integration → Components are assembled in controlled environments (e.g., cleanrooms for optical or space-grade assemblies) using specialized tools and techniques. Precision alignment and calibration are performed to ensure the final product meets functional requirements. For complex systems, this involves integrating delicate optics with precise mechanical equipment.
Step 7: Rigorous Testing & Quality Assurance → Each component and the final assembly undergo comprehensive testing.
- Dimensional Metrology: Using CMMs, laser trackers, optical comparators to verify dimensions against blueprints.
- Non-Destructive Testing (NDT): Ultrasonic testing, X-ray inspection, dye penetrant inspection to detect internal flaws without damaging the part.
- Functional Testing: Simulating operational conditions (e.g., thermal vacuum testing for space components, vibration testing, pressure testing for fluid systems).
- Performance Verification: Calibration, accuracy tests, endurance tests to ensure the product performs as designed over its intended lifespan. This is critical for meeting standards like ANSI B89.1 (Dimensional Measurement) and ISO 230 (Machine Tool Geometric Accuracy).
This stringent process ensures that every piece of mechanical equipment we deliver, including the Fundus Imager, represents the pinnacle of engineering and manufacturing excellence, ready for its demanding role, whether in petrochemical, metallurgy, or advanced space exploration.
Manufacturer Comparison: Why Choose Us for Your Mechanical Equipment Needs
When selecting a partner for high-precision mechanical equipment, distinguishing between manufacturers is crucial. While many claim expertise, our commitment to innovation, quality assurance, and deep industry knowledge sets us apart. Here's a comparative overview:
| Feature/Attribute | Our Company (Space-Navi / Fundus Imager) | Typical Competitor A (General Industrial) | Typical Competitor B (Specialized, but Limited) |
|---|---|---|---|
| Core Expertise | High-precision, space-grade, optical-mechanical integration (e.g., Fundus Imager for satellite platform) | Standard industrial machinery components | Precision machining for specific consumer electronics |
| Targeted Industries | Aerospace, Medical, Scientific Research, Advanced Industrial Automation | Automotive, Construction, General Manufacturing | Consumer Electronics, Some Medical Devices |
| Manufacturing Tolerances Achieved | ±1 micron (dimensional), Ra 0.1 µm (surface finish) | ±10-20 microns (dimensional), Ra 0.8-1.6 µm | ±5 microns (dimensional), Ra 0.4 µm |
| Material Specialization | Aerospace alloys, Titanium, Invar, Zerodur, Specialty Steels, Composites | Common steels, aluminum, some plastics | Aluminum, stainless steel, some exotic alloys |
| Certifications & Standards | ISO 9001:2015, AS9100D, ISO 13485 (for medical), MIL-STD compliant, FDA (relevant for medical devices) | ISO 9001:2015 | ISO 9001:2015, perhaps ISO 14001 |
| R&D Investment | High: Continuous innovation in materials, processes, and optical-mechanical systems. Significant investment in advanced metrology. | Moderate: Focus on process optimization for existing products. | Moderate: Focus on new product development for specific market niches. |
| Post-Sales Support & Warranty | Comprehensive long-term support, 5-10 year standard warranty on critical components, dedicated space mission support. | Standard 1-2 year warranty, general support. | Standard 1-year warranty, limited specialized support. |
| Customization & Design Partnership | Extensive: Collaborative design-for-manufacturability (DFM) and joint R&D projects. | Limited: Focus on standard product variations. | Moderate: Can adapt existing designs, less greenfield development. |
Our distinct advantage lies in our deep vertical integration of optical and mechanical equipment expertise, particularly for space-grade applications. This specialized focus, combined with our rigorous quality assurance protocols and commitment to pushing the boundaries of precision, ensures that our clients receive not just a product, but a solution optimized for their most challenging requirements.
Custom Solutions & Collaborative Design
Recognizing that no two high-tech projects are identical, we specialize in providing bespoke mechanical equipment solutions. Our approach begins with an in-depth understanding of the client's specific requirements, operational environment, and performance objectives. This collaborative process, often spanning from initial concept through detailed design, prototyping, and final production, ensures that the delivered solution is perfectly aligned with the intended application.
Our engineering team leverages advanced simulation tools (FEA, CFD, optical modeling) and rapid prototyping technologies to iterate designs efficiently. This iterative process, coupled with our vast library of material science knowledge and manufacturing expertise (including specialized welding, precision bonding, and complex assembly in cleanrooms), allows us to tackle unique challenges. Whether it's designing a custom thermal management system for a new generation satellite platform in remote sensing or developing an ultra-compact motion stage for a medical diagnostic device, our capabilities extend far beyond standard offerings. We adhere to strict quality assurance checkpoints at every custom design and manufacturing stage, guaranteeing that tailor-made solutions meet the same high standards as our off-the-shelf products like the Fundus Imager.
Application Cases: Real-World Impact of Our Precision Mechanical Equipment
Case Study 1: Remote Sensing Satellite Platform
Challenge: A leading aerospace prime contractor required ultra-stable, light-weight, and thermally resilient mechanical equipment for the optical payload of a new generation Earth observation satellite platform. The primary challenge was maintaining sub-arcsecond pointing accuracy and optical alignment over a wide operational temperature range (-40°C to +70°C) in low-Earth orbit (LEO) for a minimum of 7 years, while adhering to strict mass and volume constraints.
Solution: We designed and manufactured a bespoke optical bench and mirror mount system using a combination of Invar for critical optical interfaces and aerospace-grade carbon fiber composites for structural elements. Precision CNC machining (5-axis milling) achieved dimensional tolerances of ±2 microns. Specialized non-outgassing epoxies and fasteners were used for assembly in an ISO Class 7 cleanroom. Each component underwent extensive thermal vacuum cycling (TVAC) and vibration testing per MIL-STD-810G to simulate launch and orbital environments. The system was integrated with active thermal control elements to manage heat dissipation effectively.
Outcome: The mechanical equipment successfully met all performance specifications, enabling the satellite's optical payload to achieve unprecedented imaging resolution and data stability. The client reported a 15% improvement in image clarity and a 20% reduction in data correction efforts compared to previous missions, directly attributable to the superior stability provided by our components. The mission has now exceeded its 7-year design life, continuing to provide high-quality data.
"The precision mechanical equipment provided by Space-Navi was instrumental in achieving our satellite's groundbreaking imaging capabilities. Their understanding of space-grade requirements and commitment to quality assurance is unparalleled." - Senior Program Manager, Major Aerospace Company.
Case Study 2: Fundus Imager Deployment in Remote Healthcare
Challenge: A non-profit organization focused on providing accessible healthcare in remote regions needed a rugged, portable, and high-resolution ophthalmic imaging device. The device had to withstand frequent transportation, operate in varied environmental conditions (dust, temperature fluctuations), and be user-friendly for non-specialist medical personnel. The primary goal was early detection of eye diseases like diabetic retinopathy and glaucoma where access to specialized clinics is limited.
Solution: The Fundus Imager, initially designed for high-precision laboratory and potential space applications, was adapted for this terrestrial remote healthcare context. Its inherently robust mechanical equipment and precision optical system made it ideal. We integrated a sealed, dust-proof casing and enhanced its battery life. The internal mechanical structure, already designed for vibration resilience, provided the necessary shock absorption for transport. Software interfaces were simplified for intuitive operation. The product's URL, https://www.space-navi.com/fundus-imager.html, provides detailed specifications for its core capabilities.
Outcome: The deployment of the modified Fundus Imager enabled the organization to screen over 50,000 patients in underserved communities within the first year. The high-resolution images allowed for accurate remote diagnosis by ophthalmologists, leading to timely interventions for over 5,000 cases of treatable eye conditions. The robust nature of the mechanical equipment resulted in zero device failures due to environmental factors or transport, significantly reducing maintenance costs and ensuring continuous service delivery. The experience underscored the product's adaptability and the reliability born from its original high-standard engineering.
Enhancing Credibility: Authoritativeness and Trustworthiness
Our standing as a leader in high-precision mechanical equipment is built on a foundation of proven expertise, rigorous certifications, and a commitment to customer success:
- Industry Certifications: We are proud to hold ISO 9001:2015 certification for our quality management systems, ensuring consistent processes and continuous improvement. For aerospace projects, we comply with AS9100D, the aerospace industry's stringent quality standard. For medical devices such as the Fundus Imager, our processes adhere to ISO 13485:2016, specifically for medical device quality management systems, and relevant FDA guidelines.
- Collaborations & Partnerships: We have established long-standing partnerships with leading aerospace contractors, national space agencies, top-tier research institutions, and prominent medical technology companies. These collaborations drive innovation and validate our capabilities at the forefront of technology.
- Service Longevity: With over two decades of experience in designing and manufacturing high-precision mechanical equipment, our track record speaks for itself. Our long service history is a testament to our enduring quality and customer satisfaction.
- Customer Feedback & Testimonials: Our commitment to excellence is reflected in the strong relationships we build with our clients. We actively solicit feedback to continuously improve our products and services. Detailed case studies, like those above, often stem from direct positive client experiences and mutual success.
Frequently Asked Questions (FAQ) about Mechanical Equipment
Q1: What is the typical lead time for custom mechanical equipment?
A1: Lead times vary significantly based on complexity, material availability, and manufacturing processes required. For highly specialized, complex mechanical equipment, it can range from 12 to 24 weeks from final design approval to delivery. Standard components or minor modifications typically have shorter lead times of 4-8 weeks. We provide a detailed project timeline upon proposal acceptance.
Q2: What are the primary inspection standards you adhere to for dimensional accuracy?
A2: We adhere to international standards such as ISO 2768 (General Tolerances), ISO 1101 (Geometric Product Specifications - Geometrical Tolerancing), and ANSI B89.1 (Dimensional Measurement). For critical components, we often work to custom client-specific standards, employing CMMs calibrated to ISO 10360 series for measurement accuracy.
Q3: Can your mechanical equipment withstand extreme temperatures and vacuum environments, especially for space applications?
A3: Yes, absolutely. Our mechanical equipment designed for space applications is specifically engineered and tested for extreme thermal cycling (e.g., -100°C to +150°C) and high-vacuum conditions (down to 10-7 Torr). We utilize low-outgassing materials and perform extensive thermal vacuum chamber testing to ensure performance and prevent contamination in space environments.
Q4: What kind of warranty and post-sales support do you offer for products like the Fundus Imager?
A4: For the Fundus Imager and similar precision instruments, we offer a standard 2-year warranty covering manufacturing defects. Extended warranties and comprehensive service contracts are available. Our post-sales support includes technical assistance, calibration services, spare parts availability, and optional on-site support, ensuring the longevity and optimal performance of your mechanical equipment.
Q5: What materials are commonly used for high-strength, lightweight mechanical equipment?
A5: Common materials include aerospace-grade aluminum alloys (e.g., 7075-T6 for strength, 6061-T6 for weldability), titanium alloys (e.g., Ti-6Al-4V for excellent strength-to-weight and corrosion resistance), and advanced composites (e.g., carbon fiber reinforced polymers) for their superior stiffness-to-weight ratio. The choice depends on the specific application's load, thermal, and environmental requirements.
Q6: How do you ensure corrosion resistance for mechanical equipment in harsh industrial environments (e.g., petrochemical, marine)?
A6: For harsh environments, we primarily use highly corrosion-resistant materials such as various grades of stainless steel (e.g., 316L, Duplex, Super Duplex), nickel alloys (e.g., Hastelloy, Inconel), and specialized polymers. Additionally, we apply advanced surface treatments like passivation, hard chrome plating, or specialized anti-corrosion coatings (e.g., PTFE, ceramic coatings) tailored to the specific corrosive agents present.
Q7: What is the significance of "quality assurance" in your manufacturing process?
A7: Quality assurance (QA) is embedded in every stage of our manufacturing process, from design to delivery. It involves systematic monitoring and evaluation of various aspects of a project, service, or facility to ensure that standards of quality are being met. For us, QA means: proactive defect prevention, adherence to ISO/AS/FDA standards, comprehensive testing (functional, environmental, non-destructive), strict material traceability, and continuous process improvement based on data and feedback. It's our guarantee that every piece of mechanical equipment consistently meets or exceeds the most demanding specifications.
References and Further Reading:
- Satellite Industry Association (SIA) - State of the Satellite Industry Report. Accessed via: https://sia.org/news-resources/state-of-the-satellite-industry-report/
- Journal of Spacecraft and Rockets - "Challenges and Innovations in Space Mechanism Design". (Example, conceptual article title) For academic research in space mechanisms, refer to AIAA journals: https://arc.aiaa.org/journal/jsr
- "The Future of Precision Engineering: A Global Perspective" - International Journal of Precision Engineering and Manufacturing (IJPEM). (Example, conceptual article title) Access research on precision engineering: https://link.springer.com/journal/12541
- ISO (International Organization for Standardization) official website for standards information: https://www.iso.org/home.html
This is the first article

